|
Trunk-Mounted Battery
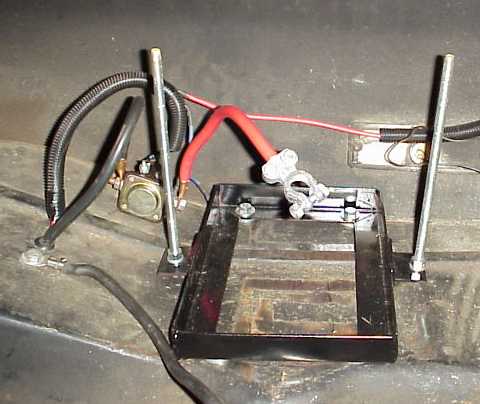
The Base:
First I bought a plastic battery box from a local store, measured it, and
welded up a frame to fit snugly under it from 1-1/2" angle iron.
I used four-3/8" bolts to secure the frame to the floor of the trunk,
two of them passing through the frame-rail flange under the trunk floor.
I welded another piece of angle-iron to the middle of the two longer sides of the
frame, drilled 3/8" holes in them, and tightly secured 3/8" threaded rod to
each one with nuts on each side to serve as part of the battery hold-down.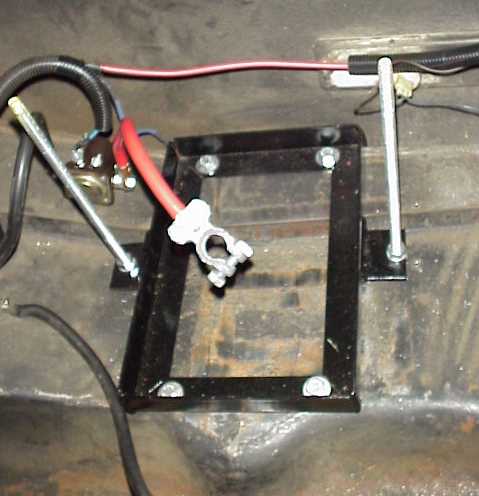
The Top:
I used a steel bar across the top of the battery with holes in the ends
for the threaded rod to hold the battery down. The bar lays across
the battery itself, holding it secure, and also keeps the battery box cover
attached securely. You can see the steel bar (painted black) running through
rectangular holes in the plastic cover. It worked out very well, if I do say
so myself.

The Final Product:


Electrical Cutoff Switch:
I also installed an external battery cut-off switch, since it's required
by the NHRA if you have your battery installed in the trunk. You're also supposed to have it in a sealed box or have the truck sealed from the interior, but I haven't gotten around to that yet. Anyway, I bought
a Moroso on/off switch and installed it through my passenger's
side taillight reflector. I debated putting it through the sheet metal,
but decided it's easier to replace the taillight lens than to do bodywork.
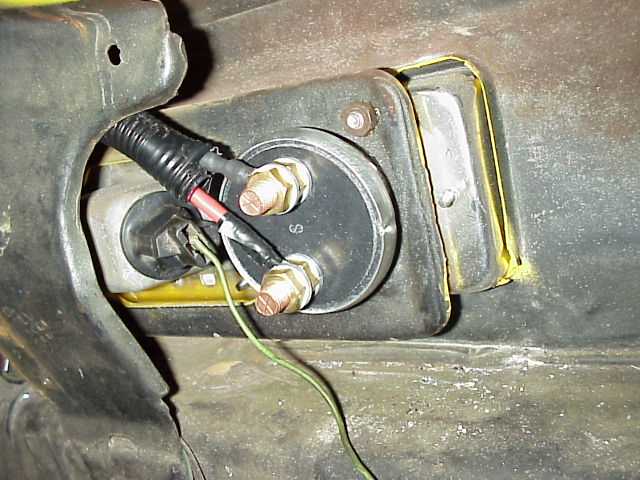
As you can see, I had to do some cutting to the sheet metal behind the taillight and to the back of the taillight housing, but it wasn't a big deal and it worked out very well. I put an on/off sticker on the taillight for racing to make it legal. It's amazing how many people ask what the heck it is, and then don't believe me when I tell them. I guess it does seem rather odd to have an On/Off switch on a car.
Ford Starter Solenoid:
By the way, that's a Ford starter solenoid to the left of the box in the pictures,
which makes it so the heavy battery cable running the length of the
car is only "live" during starter cranking. Much safer that way.
Wiring the System:
I used a wiring schematic from MAD Enterprises that was printed in Car Craft magazine many years back to set this whole thing up and it works great. MAD Enterprises knows what they're doing! Click here for the diagram.
Ground Straps:
Don't overlook that chassis-to-engine ground strap! I had lots of problems until I
added that strap, now it works great. You can't overestimate the importance of an
engine-to-chassis ground strap. Also, don't just go from the engine to the frame, make
sure you incorporate the body as well, since that's basically what you're grounding
the battery to back there in the trunk. I welded a bolt upside-down to the frame
(so it acts as a stud) and
connected one end of each cable to it, the other end of one going to the back of a
cylinder head and the other cable going to a bolt in the firewall. It really improved
the operation of my electrical system. I couldn't believe what a difference it made!
Here's a pic of my ground straps:

Feedback and questions are always welcome, please click the "Contact" links if you'd like to leave some.
© 2020 Bruce Johnson and Craig Watson